Use Diskdigger to Recover Deleted Files on Android without Computer
How can I recover deleted files on Android without computer?
Summary:
The trouble starts when accidents happen. If you’ve accidentally deleted important files from an Android device, you don’t have to find a computer to launch a data recovery tool. DiskDigger app (free version) can undelete and recover deleted photos and videos from Android devices without a computer. If you want to recover other types of files besides photos, you can get the DiscDigger Pro version and start the app in a flash.
DiskDigger Free or Pro?
- DiskDigger free version is also called DiskDigger photo recovery in Google Play Store. It can recover lost photos and videos only (recovering videos requires your device to be rooted).
- DiskDigger Pro (for rooted devices!) can undelete and recover deleted or lost photos, documents, videos, music, and more files from the memory card or internal memory of your Android device. And it allows uploading recovered files to Google Drive, Dropbox, or send them via email. DiskDigger Pro app also allows you to upload the files to an FTP server, or save to a different local folder of your device. Get it in Google Play Store
DiskDigger Pro can recover the followint file types:
JPG, PNG, MP4 / M4A / 3GP / MOV, GIF, MP3, AMR, WAV, TIF, CR2, SR2, NEF, DCR, PEF, DNG, ORF, DOC / DOCX, XLS / XLSX, PPT / PPTX, PDF, XPS, ODT / ODS / ODP / ODG, ZIP, APK, EPUB, SNB, VCF, RAR.
So choose DiskDigger pro or free version? It’s your decision.
Now, let’s start to recover your deleted files from Android device without computer.
Launching DiskDigger App on your Android
The process of restoring deleted files on Android is easy. Let’s take the pro version as an example. After launching the DiskDigger Pro apk, you can choose “Basic Scan” or “Full Scan” as your option.
As you can see, the “Full scan” requires rooted device, whereas the “Basic scan” is available on both rooted or unrooted device.


For rooted device, you can select the memory partition to scan. You Android internal memory usually appears as “/data”, and the device’s SD card usually appears as “/mnt/sdcard” or something similar.
For unrooted device, just tap on “Start basic photo scan” button, and continue to the “Scanning for files” section below.
If you use the Android recovery app on your rooted device, you may get the Superuser request window. Please press “Allow” to grant DiskDigger root access.
Once you have selected the memory device to scan, the app will ask you to choose what types of files you would like to recover. You can choose only the file types you actually need to get fast speed and better performance.

Scanning for deleted files on your Android
After tapping on “OK” button for scanning, the app instantly start scanning for deleted files and populating with recoverable files:

You can tap on the checkbox before any of the files you need to recover. Or you may tap on the overflow menu (three dots) on each of the files, to see recovery options for each individual file.
Recover deleted files
To restore deleted photos, videos, and documents on your Android device, you can select from three options: Save to an app, Save to device, and FTP upload.

Save recoverable files to an app on your device
This is the most recommended method for retrieving deleted or lost files. You can send the files to your Email app, then email the files to yourself. You can also save the files to a cloud storage app such as Dropbox or Google Drive. Your device will automatically let you select the app to which the files will be sent:

Saving by FTP uploading
You can upload your recovered files to an FTP server. diskdigger will display a dialog for you to enter the FTP server’s host name, your user name and password for logging onto the server.

Tap on “OK” to start uploading recovered files to an FTP server. You could see the status updates at the bottom of the screen during the uploading process. The files will be named based on the location where they were found.
Save the files to a local folder on your Android
Important things you should note: I think this is the last option you should choose only if you can save the file onto a different partition than the same one from which the files are deleted and recovered. For example, if you’re retrieving deleted files from Android internal memory, you should save the files to an external SD cart. If you choose to save the files to the same partition from which the files were recovered, you would risk permanently overwriting the very same files that are being recovered!
Short to say, I suggest you should always attempt to use other methods of saving the files, like save to another app or upload to FTP before resorting to saving locally.
Then let’s to see how to save the recoverable files to a custom location on your device.
1. Restoring files to Android 5 (Lollipop) and above
By selecting to save files to local folder on your device, you will go to the step of Android directory picker that you can choose the folder for saving recovered files.
It is a bit difficult to use Android file chooser for most user. For Android 5 Lollipop and above, you can see an empty screen with an “Open from” title like in the screenshots below, then follow these steps:
- Swipe away the “Open from” panel to the left.
- Tap the overflow menu (three dots) in the top right corner, and select “Show SD card” or “Show internal memory”.
- Tap the navigation menu (three lines in the top left corner, and you should now be able to pick the SD card or Internal memory and navigate to the exact location where you want to save the files.

2. Saving files back to Android 4.4 (Kitkat) and below
For Android 4.4 and below users, you will be prompted to select the directory where the file(s) will be saved. The directory defaults to the location of the memory card on your device (most commonly “/mnt/sdcard”). The directory picker allows you to navigate through the directory structure of your device:

Just as its name, DiskDigger helps finding and recovering the deleted files by digging internal/external memory of your Android.
Note:Your Android should be rooted by running DiskDigger on your device. If you’re using a non-rooted device, the limitation can not be avoided. You can only recover deleted photos with lower-resolution. So if you want to regain the original full-resolution photos, as well as videos and other type of files, you should root your device firstly.
Smartphones are enough powerful that they can recover deleted files on Android OS. But I still believe that if you have lost your data from SD card just use computer to recover lost data from sd card. Because it will give you high chances of recovering that file.
Although smartphones are powerful enough that they can recover deleted files on Android OS. I still believe that retrieving deleted files on Android with computer is safer since during the installation of the recovery app on Android phone, the deleted files might be thoroughly overwritten and become unrecoverable.
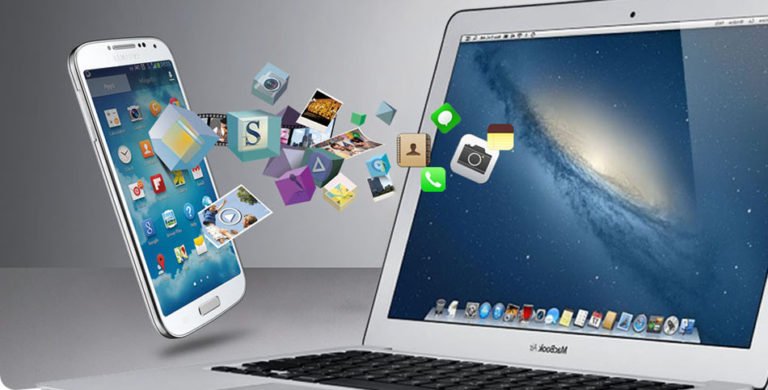
dr.fone – Android Data Recovery is a reliable software that can run on Windows and Mac computer for recovering deleted or lost photos, videos, contacts, calendars, call logs, WhatsApp messages, and more from Android internal memory or SD card. And with dr.fone, you don’t have to root your Android device for retrieving files.

Recover Deleted Files from Android Unrooted
Lost files from Android phone but don’t want risking your own Android smartphone security? Don’t worry, you can still retrieve deleted photos, videos, contacts, messages, and other files on Android device without root.