How to Transfer Photos from Kindle Fire to Computer?
Amazon Kindle Fire and typically an Android tablet are very similar. They do use a lot of the same code, however, there is just enough difference in both operating systems. Then how to actually transfer photos and videos from the Amazon Fire tablet over to your computer.
If you’ve taken numerous photos and videos on your Fire HD 8, or Fire HD 10 Tablet with Alexa, these Kindle tips can be helpful for you to transfer your files from Kindle Fire to your computer. Let’s the go-ahead to the computer and get started.
Before we get started we’re gonna need a couple of different items.
- One thing is your Kindle Fire tablet that you have.
- The other is the cable that comes with your tablet. Just because some third-party USB cables may not actually have the ability to transmit data.
Where are Photos stored on Kindle Fire?
Amazon’s Kindle Fire takes photos or shoots videos with its built-in camera. You can keep your photos and videos in the internal storage or microSD card of your Fire tablet, or store them in Amazon Cloud Drive.
The default location for the Amazon Kindle and photos is in the internal storage.
If you know clearly where the photos and videos are stored on your Fire tablet, things become easy for you to backup/transfer pictures or files onto your computer from your device.
How do I transfer Photos from Kindle Fire to Computer
Method 1. Transfer files via Cloud Drive
If you’re buying all your apps, music, movies, and books on Amazon, Amazon automatically saves it in the “cloud” and you can simply login on your computer to Amazon and transfer everything that way. Of course, you can manually transfer photos that you’ve uploaded to Amazon Cloud Drive to your computer.
- Go to the Amazon Cloud Drive and log in to the Amazon account associated with your Kindle Fire.
- Click on the “Pictures” folder and then click the “Kindle Photos” folder.
- Select the checkboxes of the pictures you want to download and click the “Download” button. Choose where you want to save the photos and click “Save.”
However, many people prefer to simply hook the Kindle Fire up to the computer. Not only you can transfer files from Kindle Fire this way, but you can also transfer files from your computer to the Kindle Fire easily, as well. You are simply going to need a USB cable that works with the Kindle Fire.
Method 2. Transfer Files from Kindle Fire via USB
Step 1. Plug the USB cable into the Fire tablet
Once you’ve connected your Kindle Fire to the computer with the USB cable, you may get a little tone that indicates that it has connected. If you don’t, what you’ll need to do is to put in your passcode or your password for your Kindle Fire and that will allow you to finish the communication to the computer.

Step 2. Create a folder to store your photos
Go to the further step, create a folder that we’re going to use later to actually back up the files. You can put the file anywhere you want. If you have a specific location where you store your photos or if you use the default pictures folder of the computer.
Here I’m going to go ahead and put it right here on the desktop. To do that, we’re gonna right-click, hover down New and then left-click on Folder, and name the folder whatever you want. Once you have that, just go ahead and hit enter and it will finalize that edit. We’ll come back to this folder in just a few moments.
Step 3. Transfer pictures from Kindle Fire to PC
What we’re gonna do now is the bottom left hand of the screen, you’re gonna notice you may have a file explorer window, left-click on that and you’ll notice that the Fire device will show up under devices and drives. Double left-click on Fire, you may have two different locations for storage if you have a MicroSD card in your Fire tablet. I use the default location for my Amazon Kindle and Photos. I don’t actually have a memory card plugged into it. But if you do, it will have an extra memory card showing up right here to the right.
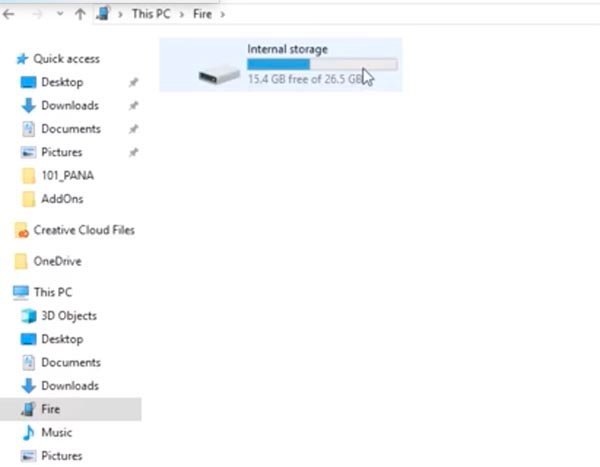
1. Double left-click on internal storage, and we’re gonna look for a file that says DCIM stands for Digital Camera Image.

2. Double left-click it and then double left-click Camera.

3. And then you’ll see the pictures in the folder.
4. Then, you can highlight by left-clicking and dragging, and that will select them allowing us to copy those over. Or you can hit Ctrl+A to select and backup all of those photos to the computer.

5. Navigate on the desktop and find out where we put that folder. If you look on the left of the desktop, you can find the Kindle backup folder you’ve just now created.
6. Then, drag the selected images to the Kindle backup folder, by holding left-click.
7. You may see a progress bar that comes across the screen.
8. Double check and make sure that those photos have actually backed up to the folder.

Recover Deleted Files from Kindle Fire
Have you ever accidentally deleted photos, videos, books on Kindle Fire HD? You can recover deleted files from Kindle Fire with an Amazon account or Kindle file recovery.